Categories
Concrete New Homes

What is a Raft Slab

A raft slab is a reinforced concrete slab on ground that is strengthened with integral concrete beams in both directions.

Usually, a raft slab is used as the foundation for new houses and extensions. Raft slabs in Australia are designed to comply with Australian standard AS2870.

At Cornell Engineers, we call the strengthening beams strip footings (because they run in parallel strips). The beams around the outside are called edge beams.

How Thick is a Raft Slab

The slab portion of a raft footing and slab is normally 100mm (4 inches) thick.

Sometimes the slab is made thicker, up to 150mm (6 inches) thick, to make it stronger or able to span further. 

The strip footings vary in depth depending on the soil conditions on the site. A site classification by a soil tester tells us how reactive the clays are.

Then the stip footing design is done in accordance with AS2870.

What is the Minimum Thickness of a Raft Slab

In residential buildings, the minimum thickness of a raft slab is 85mm (3.35 inches) in waffle slab construction and 100mm (4 inches) in raft slab construction.

How is a Raft Slab Built

Here’s the process for building a raft slab for a house.

Step 1 – Set Out

A builder sets out the outer boundaries of the house using surveying equipment.

Smart builders use a surveyor to make sure the house is in the correct location and on the correct site!
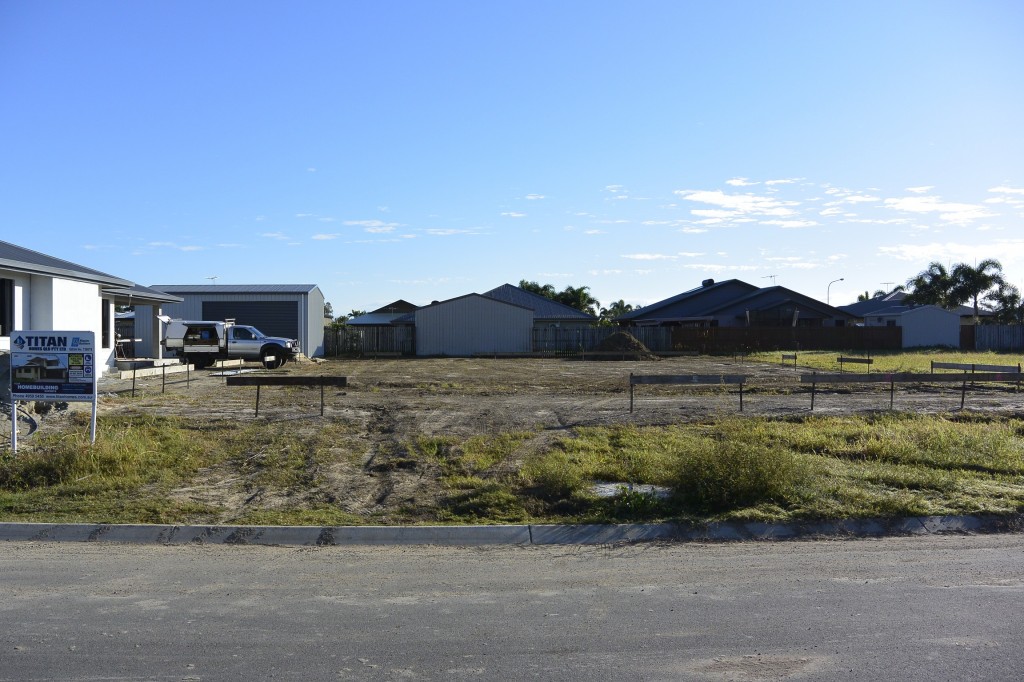
House site for a new raft slab
Raft Slab Survey Complete. Photo courtesy of Titan Homes Mackay.

Step 2 – Edge beams

The footings around the outside of the house are called edge beams. The edge beams are dug into the ground.

The width of the edge beams is normally 300mm unless soil conditions require the edge beams to be wider.

The depth of the edge beam depends on the reactivity of the soil.

Step 3 – Steel reinforcement for raft slabs

Steel reinforcement is placed into the edge beams.

The steel can’t be close to the ground or it will rust and fail – so concreters use plastic supports called ‘bar chairs’ to hold the steel away from the ground.

The amount of steel is specified by the structural engineer depending on the site reactivity and the depth of the edge beams.

If the soil where the edge beams are required, the builder sometimes digs the edge beams deeper so that the footing is dug into hard ground. The steel reinforcement is then suspended at the depth specified by the structural engineer.

Step 4 – Edge beams filled

The edge beams are filled with concrete up to ground level.

Steel starter bars are placed into the wet concrete at regular centres and are left sticking out of the footing to connect the slab to the edge beams.

The strip footings aren’t poured until the slab is poured.

The exact location of the starter bars isn’t very important, but their spacing is.

If you are an engineer, the diameter and spacing of the starter bars are a shear flow problem. There needs to be enough bars to make the slab and beams work as a single beam. The starter bars are not required if the edge beam and slab are poured at the same time.
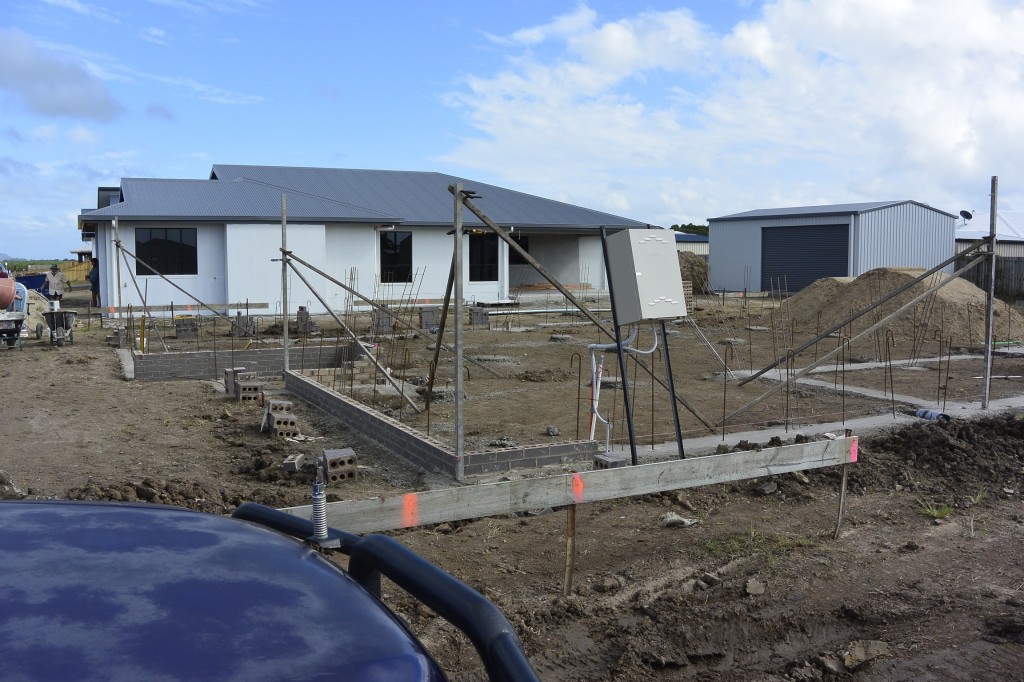
Raft slab footings have been poured
Raft Slab Edge Beams Poured. Photo courtesy of Titan Homes Mackay.

Step 5 – Sand fill

Once the edge beam concrete has hardened, the concreters will place the sand that goes under the slab to make it the correct height. Sand or crusher dust or decomposed granite are all acceptable in my opinion.

The sand has to be compacted so that it is firm and hard because it has to support the wet concrete of the slab before it cures.
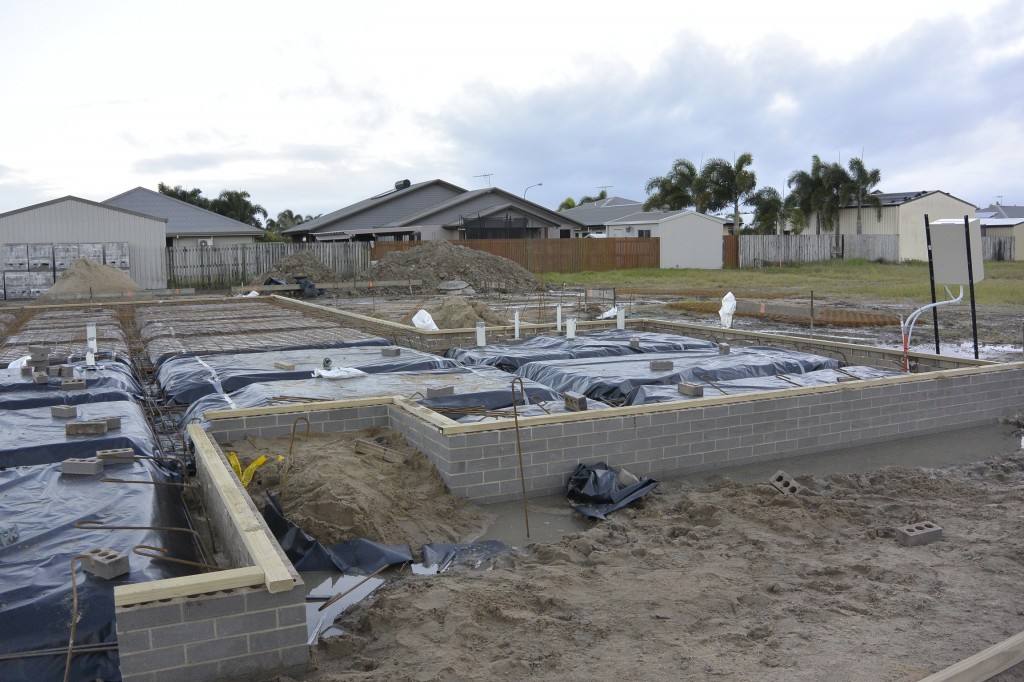
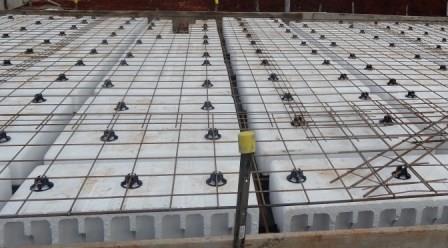
Raft slab plastic and mesh being placed
Raft slab being prepared by a builder. Photo courtesy of Titan Homes Mackay

Step 6 – Excavate strip footings

Once the sand is placed everywhere under the slab, the concreters remove the sand from where the strip footings run.

If the surface of the slab is high enough, the strip footings will be above the original ground level. Otherwise, the concreters have to dig through the sand and remove some of the original ground to get a deep enough strip footing.

Step 7 – Damp proof membrane

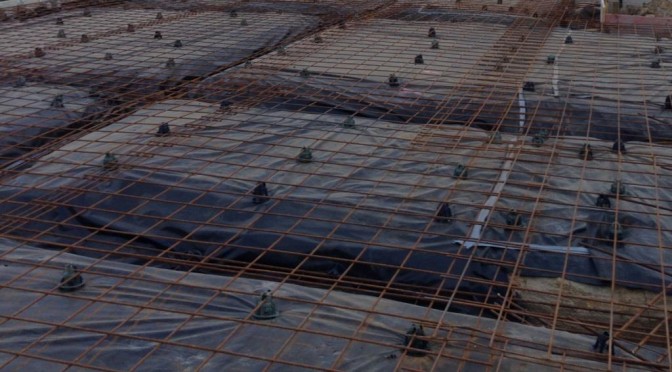
The concreters place a black plastic sheet into the strip footings and over all of the ground under the slab.

The edges of the sheets of black plastic have to be lapped and taped because the plastic stops the ground sucking moisture out of the wet concrete before it cures and also helps stop moisture rising out of the ground and through the concrete.

Step 8 – Slab reinforcement

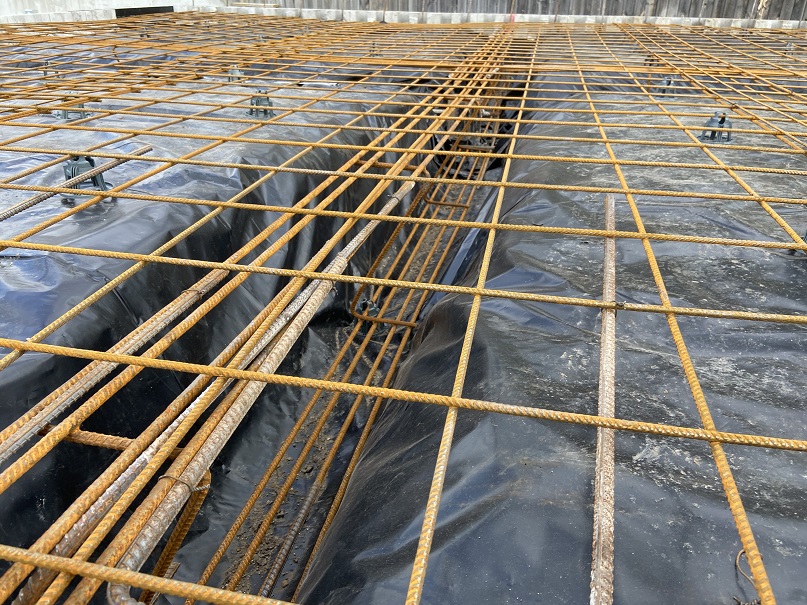
The concreters place steel trench mesh reinforcement into the strip footings and sheets of slab reinforcement mesh everywhere in the slab.

The concreters use plastic bar chairs to make sure the reinforcement is not touching the plastic and is not sitting so high it is poking out the top of the slab.

The slab reinforcement is very important because it helps control the size of cracks in the surface of the raft slab. See this post on shrinkage cracks.
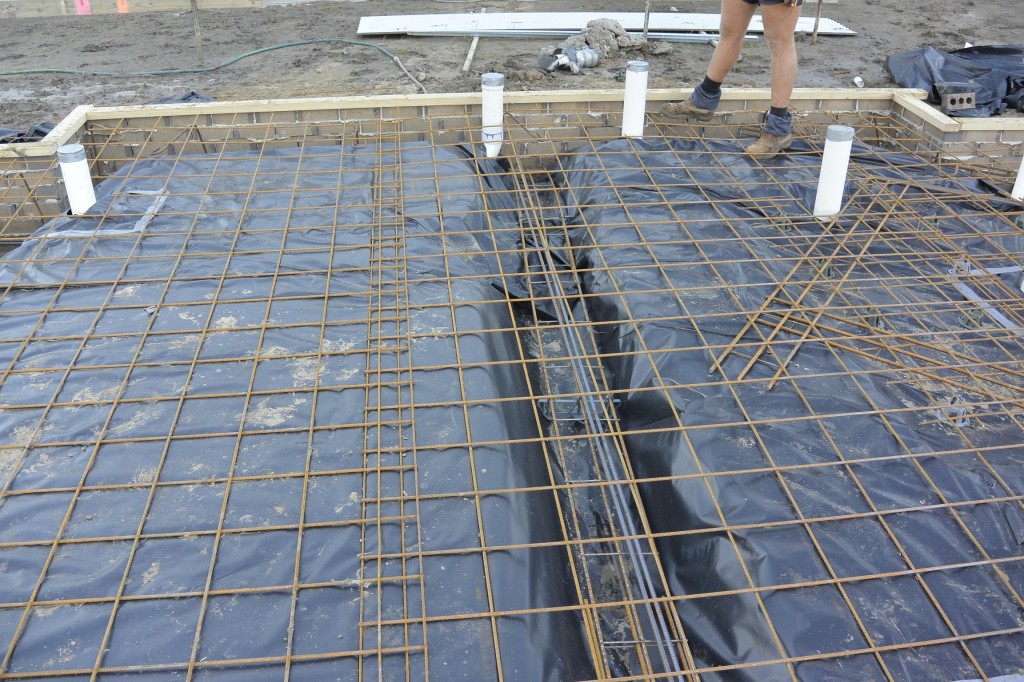
Raft slab construction
Raft slab strip footing and slab mesh. Photo courtesy of Titan Homes Mackay.

Around the outside of the raft slab – above the edge beams – the concreters use formwork or concrete blocks to make the sides of the slab.

If the ground is sloping, sometimes the concrete blocks are laid before the sand is placed – but that makes it very difficult to place and compact the sand properly.

Step 9 – Pouring the raft slab

The concreters pour concrete into all of the strip footings and the slab using concrete trucks and concrete pumps. We prefer they use boom pumps because they are less likely to knock the bar chairs over.

The concreters make the concrete surface smooth and level (called screeding) and then allow the concrete to dry (called curing).

If the concrete dries too quickly, the surface can crack – just like mud cracks when the surface dries when it is still wet underneath. The concreters use special chemicals called ‘curing compounds’ to make sure the concrete all cures at the same time.
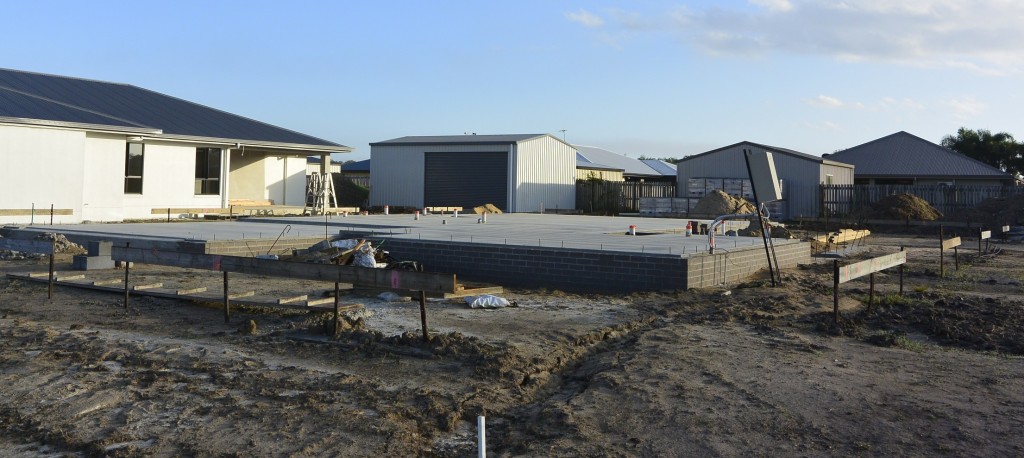
Raft slab concrete is curing
Raft slab concrete has been poured. Photo courtesy of Titan Homes Mackay.

The Raft Slab is Finished

The concrete reaches its full design strength in less than 28 days (normally about 23 days) but the slab can be walked on and worked on well before that.

The formwork is normally removed the day after the concrete is poured.

Who Designs Raft Slabs

Raft slabs are designed by structural engineers experienced in residential construction.

There are lots of rules for working out the depth and spacing of strip footings in a raft slab so it is very important to get them right.

An experienced structural engineer can give you an accurate and cost-effective raft slab designed to suit your site.

How Can Cornell Engineers Help

Cornell Engineers has been designing raft footings and slabs since 2003.

Our footing and slab designs comply with AS2870-2011, the Australian residential footings and slabs code.

When we design raft slabs we ensure your slab is suitable for your site by designing your slab to comply with the soil conditions on your site as described in your soil test. 

We save you money by making sure our raft slabs drawings are easy to understand and easy to build from.

Contact Us or Get a Quote.

Categories
Concrete New Homes

Beware Waffle Slabs

Let’s face it. If you even know what a waffle slab is, you’re either building one or having one built.

What are waffle slabs? Are they a great idea? What can you do as a homeowner to make sure your waffle slab performs within expectation?

I’ll answer these questions and finish up with why, after 29 years of full-time structural engineering, I have never, ever designed one waffle slab.

Categories
New Homes Tips & Tricks

Better Buildings for Brisbane

Builders take Note

I’ve worked for more than 20 years as a structural engineer in regions of Queensland that suffer the threat of cyclones. With Cyclone Marcia looming off Rockhampton at the time of writing, I’d like to address those new home builders in Brisbane that think they can relax because “Brisbane doesn’t get cyclones.”

Brisbane Doesn’t Get Cyclones

Fundamentally you are correct. And the benefit is you can build beautiful, big, high ceiling houses using a lot less timber than you can in cyclonic areas.

But if you as a builder are cutting corners to trim costs: I put you on notice. Brisbane still gets storms – and they can be furious!

Brisbane Homes need to Built Better

The building structures and building practices Brisbane builders are using to save money are well below what I consider adequate.

Brisbane builders you are also putting your clients – the new home owners – AT RISK if:

  • If you have cut the budget for your soil testing
  • If you have strong-armed your engineers to produce ‘cheaper’ designs
  • If you use a particular certifier because they don’t inspect quite as thoroughly

We Haven’t Done That Before

Too many times in my career as an engineer I have heard concreters and carpenters say ‘We’ve never had to do ‘that’ before.”

Well guess what. Building standards were improved a long time ago and it’s time you updated you practices.

Start Building Better

It’s time that substandard designs, cut price soil tests and poor building construction techniques are eliminated.

Australian standard AS1684.2 is the manual for residential timber construction and you should be using it. Storms DO happen in Brisbane area. Are the products you are producing going to pass the test?

A Message to Home Buyers

If you are a home buyer and you are about to build a new home, there IS a way you can get value for money, a good design and peace of mind in the next storm.

You cannot simply rely on what you are being told by the builder. You cannot even rely on what other customers are saying.

To be truly responsible for your own decision, the only way you can be sure you’ve chosen a good mass market builder is to inspect the buildings they are building.

And if, as my old neighbour used to say, “You don’t know shit from clay”; get some expert advice on your side.

An inspection by an independent inspector or structural engineer of a building being built by your builder will give you peace of mind.

Check Out the Workmanship

I have some suggestions for you for next time you walk through a display home:

  • Look for cracks in the concrete.
    • Some builders cleverly disguise the concrete surface their display homes with vinyl, carpet or spray on floor coverings. Under that surface is a representative sample of the concrete finish you can expect with your new home.
    • Ask to see the concrete! When it comes to cracks, you’re as good at spotting them as me. So look and find.
    • Cracks in concrete mean a variety of things and may not be a problem, but if you are looking for bang for your buck, then aesthetics are important. Builders know how to produce crack-free concrete but they rarely do. DO NOT accept substandard concrete.
  • Push on the walls. Find the tallest wall in the house – it might be a feature wall or a vaulted ceiling. Push on the wall! See if the wall moves. Push on another lower wall and see if it moves too. Some builders are using skinny sticks of timber in walls and they have been for years. There is no excuse. Regardless of wind classification or cyclonic region you are building in, the walls in your new house should be sturdy and SHOULD NOT MOVE when you push them.
  • Check your walls for straightness. A friend of mine had a new house built near my place. He asked me to look at it two months after he moved in. He complained that the walls weren’t straight. He could tell because the line of the tiles didn’t align with the walls. His walls were crooked. It wasn’t too late to fix because the building was still under warranty but it left him with a bitter taste in his mouth. After a lot of hard arguing and complaining, my friend had his walls straightened and the tiles re-done. Get in early. Check out the lines of the display home walls against the lines of the tiles. Don’t accept substandard workmanship.

Arrange an Inspection

If you have found a builder you like but you want a hand inspecting a house under construction please contact an independent building inspector.

An independent inspection at timber framing stage or concrete slab stage will give you the expert advice you need at a price much less then the hassle of a substandard building.

If this article has helped you please leave a comment.

This article was written by Matt Cornell of Cornell Engineers.

Categories
New Homes Project Updates

Samford Valley Projects

Samford Valley, Brisbane! What a beautiful spot to build your new home or plan an extension. Rolling hills. Country living close to the city. I think it is an absolutely delightful spot and I love heading out there to do inspections.

Cornell Engineers are proud to have been involved in a couple of Samford Valley construction projects recently. We’ve got one house

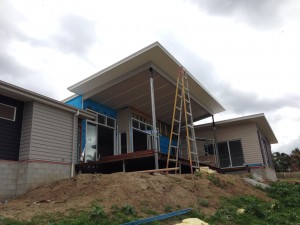
Photo of new house being built at Samford Valley
Samford Valley House

under construction in Angshelle Court already with another one to start very soon! They are magnificent homes with nothing left to chance. If you want to live in a beautiful country setting live at Samford Valley. If you want your new home designed and certified by a great structural engineer, call me – Matthew Cornell – 07 3102 2835.